Tuesday, August 7, 2012

Ways to upload and view photos online

Boys and girls, do you like taking photos to record moments in life,such as a birthday party, family travel, graduation celebration etc? What if you want to upload them to websites? So your friends can view and add comments using their computers.Also if you like ,people around the world can view them. This is article is about ways to share photos online.

Way1 .Make a photo slideshow and upload it to YouTube and Facebook
This is the most interesting and prevalent way nowadays. Convert your photos to slideshow, apply transition and pan&zoom effects , add art-clips, add subtitle, insert a background music, choose an album. So photos can be played with music and other effects.

Then upload the slideshow video to YouTube, Facebook and other social sites to share with friends online. Also you can burn photo slideshow to DVD and watch them on TV when family and friends gather together.

To make a wonderful photo slideshow, you can use DVD Photo Slideshow, or other slideshow makers.

put photos on facebook and youtube

Way2.Upload photos to blog

There are many good free blog websites, such as WordPress, Google blogger, Tumblr. Register a free account and choose a template to make the blog beautiful. Then write a blog title related to photos, so people will know these photos information quickly.

Insert photos, tag them, and add caption and description. Then write something to express your feeling about them or explain where these photos are taken. After blog finished, publishing it .

Also you can make a slideshow with these photos then upload and embed it to your blog easily using DVD Photo Slideshow.

Way3. Upload photos to Picasa web album

Picasa web album is a famous photo management and sharing website. To sign in Picasa, you just need to use your gmail account. Create an album name then upload photos from your computer.

Then you can add caption and tag to photos. Photo editor function is also available in Picasa, which is really useful to make photos more beautiful.
With Picasa, you can view these photos in slideshow online and change the photos play time.

put photo to picasa
Way4. Upload photos to Flickr web album

Flickr is one of the best online photo management and sharing application. You can use your Yahoo account to sign in. Upload your photos and add description and tag, set them.

Also you can click the “slideshow” to view photos in an interesting way. Compared to the slideshow made by professional slideshow software, picasa slideshow has less effects. Also you cannot add music to the slideshow.
Flickr also allows you to upload a video. So you can make a professional slideshow with these photos and upload it to Flickr for sharing.

upload photo to flickr

Way5. Pin your photos to Pinterest

Pinterest is a pinboard-style social photo sharing website. To pin your photos to Pinterest, you have to put photos to blog or other websites, then you can pin them. It does not support photos direct uploading.

If people like your photos, they can click “Like”, comment or repin them. Here, your friends can follow you and see your pins to enjoy the photos.

Thursday, August 2, 2012

How to watch Canon camera photos on TV with transition and music

How to watch Canon camera photos on TV with transition and music
Learn how to burn your camera photos to dvd with transition and music for enjoying them on TV or PC.

Every moment is special, no matter sad or happy. We like taking photos to record and cherish some moments, pictures about birth, graduation, travel , wedding and so on means for a memorable times. Camera is a good tool to take down our experience with snaps and photos can recall many best memories we have forgot.


burn

To enjoy your photos on TV, you can use a all-in-one DVD Photo Slideshow Maker. It is available for making a slideshow with photos in many formats at ease by providing stunning transitions, cool pan&zoom, art-clips etc. It enables you to burn the photo slideshow to DVD easily for preserving or playing on TV and PC.
Before burning photos to DVD , you need transfer photos to computer from Canon camera first.

Step1. Import Photos and Music

Download and install DVD Photo Slideshow software. Launch the program, start from tab “Organize”, you can import your favorite photos and music. You can import video clips if need.

Step2. Choose Photo Transitions

Once photos imported, each photo is applied with random transition automatically. But you can change photo transitions by double-clicking transition thumbs that you like. DVD Photo Slideshow contains 300+ transitions for making a good slideshow. If you like, you can set the transition and slideshow duration.

photo

Also, you can personalize other effects for slideshow, including art-clips, themes, text, subtitle, pan&zoom etc, which will make the slideshow more stunning.

 Step 3. Choose a DVD Menu

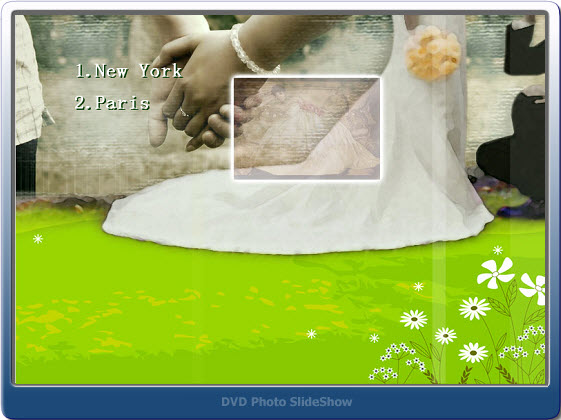
The DVD menu templates in DVD Photo Slideshow can help you make a good-looking DVD menus easily. The DVD menus are grouped into kinds of categories including wedding, graduation, baby, Valentine’s Day, birthday and so on. Also you can add a background music and image for DVD menu.

dvd

Step4. Burn photos to DVD

Go to “Burn Disc” tab, choose DVD Video disc to save the photo slideshow. It can burn photos to DVD easily and quickly.

If required, you can save the photo slideshow to your computer, export a photo video for playing on mobile devices(iPhone, iPad, iPod, Archos, PSP and so on) or share the photo slideshow to YouTube.

It is so easy to burn your Canon photos to DVD with music and transitions with DVD Photo Slideshow. Get the DVD Photo Slideshow software, save your photos on DVD and enjoy them on TV.

Monday, July 23, 2012

How to make a wedding photo slideshow and burn it to DVD

Wedding is one of the most important thing in our life, wedding means we find our life partner. Nowadays, many people take wedding photos to record the happy wedding moments. Making a wedding photo slideshow and burning it to DVD for playback on TV can be a better way to store these photos.

In a weekend’s night, sit in the sofa and enjoy the DVD wedding slideshow on TV to recall the precious and memorable moments with your mates. When your friends come over, show them your happiness on the big TV screen.

Anyway, it is wise to make a slideshow with wedding photos and music.


wedding slideshow

What preparations do you need to create a wedding music slideshow DVD?
1.Wedding photos
2.Wedding music
3.Wedding photo slideshow software---DVD Photo Slideshow

Why choose DVD Photo Slideshow to create wedding slideshow?

1, Its easy-to-use and user-friendly feature. You just need three steps to make a professional slideshow---Organize Photos, Choose menus, Burn Disc.

2, It allows to add photos by dragging them. So you can easily to import the photos. Also you can add all photos in a folder in time.

3, Text and artclips adding function. With this function, you can edit your photos with text to describe them or add a text slide and add artclips to decorate the photos.

4, Different ways to add background music. Adding background music to a slideshow is not attractive, but what attracts me is that it provides three ways to add background music---Import from PC hard disc, Ripper from Audio CD and Record sound.

5, Stunning album themes for Choosing. A slideshow with a suitable theme can better create the atmosphere. For a wedding slideshow, choose a wedding theme seems good.

6.Eye-catching DVD menus. You can choose a DVD menu for showing before playing the wedding slideshow video. It can create a better atmosphere.

7. Built-in DVD burning function. After making the slideshow, go to step3, choose DVD output format, then click “Burn now” to burn the slideshow to DVD disc.
After the DVD wedding photo slideshow is finished, you can enjoy it on TV with your friends and families and share your happiness with them.

If you want to create a photo slideshow video and share it on website, such as YouTube, Facebook or blog, you just need to choose other video output formats instead of DVD. The software supports kinds of popular video formats, including mp4, avi, flv, mpg, swf, mov, mkv, even HD video.

Begin to do your wedding photo slideshow DVD now>>

Wednesday, July 18, 2012

Make a photo video about your favorite celebrity with music


Wanna make a video with your favorite star’s photo and person information? So you can enjoy it on your mobile devices(such as iphone ,ipad, ipod) wherever and whenever you are. Or you can share it with your friends on YouTube and Facebook. Also you can create a photo slideshow DVD for playback on TV.

Before making the video, you should do some preparations:
1, Your favorite celebrity’s photos and personal information
2, Appropriate or favorite music
3, Photo video software, Such as Widows Movie Maker(It is free),DVD Photo Slideshow(work very well)

I think most people are familiar with Widows Movie Maker , So I will explain more about DVD Photo Sideshow.

Well , what is DVD Photo Slideshow used for?

DVD Photo Sideshow is a software to create professional photo slideshow. I say it is good because I have used it for a long time and it really works well. It has helped me make many perfect photo videos with different themes. I made a Valentine’s Day slideshow for my boyfriend, he was very happy. I made a friendship video for my best friend’s birthday with a friendship song, she liked my gift very much. For every important and special day, I like making a photo slideshow to celebrate it. Of course, I have made several photo videos about my favorite celebrity with DVD Photo Slideshow.

Why I like making photo slideshow?

Because I like taking photos to make the good time eternal. I may forget it , however with the photos, I can recall all the best memories. But I want to enjoy my photos in a special way, I believe a music video with many effects can be a better way. So if you have many photos , you can try to make a photo slideshow too.

What features of DVD PhotoSlideshow can attract me?

1, It is very easy to use which just needs three steps –Organize Photos, Choose Menus and Burn Disc.  I can create a photo slideshow easily with it .
2, It provides kinds of dynamic and cool transition effects. With the transitions, I can control how the slides come out and disappear.
3, It provides 3 different ways to add background music---Import form your PC Disc, Ripper from Audio CD or Record sound.
4,It allows me to add text(introduction) to photos or add a blank image then edit it with text. With this function, I can put my idea in the video and make a video with subtitle.
5, It has the function of adding artclips which can decorate my slideshow. Also I can import my favorite pic as artclip.
6. It provides kinds of Album themes for choosing, such as Christmas Day theme, Thanks Giving Day Theme, Birthday Day theme and more. So I can choose one according to situation.
7, Beautiful DVD menus are available. This function is very useful when I burn the slideshow to DVD for enjoying on TV.
8. It supports diverse output formats, including DVD/ VCD/SVCD/ Blue-ray Disc and various video formats, such as mp4/ avi/ 3gp/ flv/ swf/ mov/ mkv even HD video.

So with the DVD Photo Slideshow, I can make a good picture video for TV, iPad, iPhone, iPod , YouTube, Facebook . I can make a picture slideshow about different themes for different purposes.

If you also want to make a slideshow, try this software, I believe it can be very useful.

Make a photo video about your favorite celebrity now.

Wednesday, July 11, 2012

Create Everlasting Wedding Slideshow with DVD Photo Slideshow

My fiancée and I have decided to host our wedding ceremony in 2 months. As the exciting day approaches, we do anticipate a remarkable wedding, with best wishes from our families and friends and sincere marriage vow from the better half. We have known each other for more than 4 years and gone through too much in the meanwhile. We have also reached a consensus that the wonderful memories should be recorded in remembrance of our everlasting love.

So what is the best way to get our good old days recorded? As a digital photography fan, the first idea that came to my mind was to burn all our photos into a DVD disc. I then started to collect and sort all our photos and saved them to a folder in my computer. All of them took up to 2GB of my hard drive space. I inserted a DVD disc into my computer and began to burn the photos with the built-in DVD burner in my Windows 7 system. The burning process went very smoothly, yet the result was not that satisfying as expected. This idea failed and I had to give it up.

Actually, what I had expected was a DVD slideshow with all our photos. When playing the DVD on TV with a DVD player, what needed to be shown in front of us was a dynamic photo slide show with theme songs and sort of decoration effects. At this point, the DVD created using the built-in DVD burner in my computer was just too plain and monotone.

After doing a search for DVD slideshow software on Google for some time, I finally got the software I really needed. It was DVD Photo Slideshow developed by Socusoft. I felt so happy as this piece of slideshow software happened to have wedding themes. What's more, it let me put photos from different folders into different albums, in which way I could better organize our photos. For example, I could create an album with all my fiancée's photos, another album with all my photos, and a third album with all our photos. Also, I could make albums by genre of place, year, festival, etc. In total, there were 76 themes that could be used to decorate the albums. Several of them could be applied to a wedding slideshow. Since I was going to make a DVD slideshow, I certainly needed to choose a DVD menu that best fitted the wedding slide show. And there were also wedding menu templates in DVD Photo Slideshow. To be honest, the cool album themes and DVD menu templates were the primary reason why I chose DVD Photo Slideshow among a lot of other similar program.


Like other DVD slideshow programs, DVD Photo Slideshow can create a slideshow with background music, transitions, Pan&Zoom, art clips, text, subtitles and more. I'm not going to elaborate them here. The last point is that DVD Photo Slideshow also lets users save the slideshow project as a video files and it offers optimized presets for popular portable devices such as iPad, iPhone, PSP, Zune, Creative Zen, Mobile Phone and more. As far as I am concerned, I am going to output all my albums in DVD Photo Slideshow to video files for viewing on my newly purchased Galaxy Tab. Hope the output quality won't let me down.

At last, I'd like to say when I presented the slideshow DVD to my fiancée; she was very happy and truly touched by me. All my efforts paid off.

Monday, July 9, 2012

How to create a photo video

For a special day, you can make a video to celebrate it.A Mother's Day video with mother's photo and a mother's song can express your love and thanks to mother. A Christmas music video can boost the atmosphere.A bithday video for friends can strenghten your friendship.The following content will show you how to create a photo video with best slideshow video maker---Photo DVD Burner.
First you need to install the photo video maker---Photo DVD Burner and launch it. Then follow the step-by-step guide.

1.Organize Photos

In this step, you can import photos and edit them, choose transition effects and background music, choose album theme and preview the photo video.

photo video maker

Import photos and edit them

In the sub-tab “Album photo”, click “Add” to add photos. Then you can double-click the photo to add text, artclips and subtitle. Or you can set Bright/Contrast and Color balance. You can click “More” to add a blank image and Randomize slides order.

Choose Transition & Music

Click “Transition & Music” ,you can choose dynamic transition effects for each slides from over 300 kinds. Double-click to apply it. You can add one or more background music by clicking “Add”, or ripper a song for Audio CD, even record your voice as background music.

slideshow transition & music

In the Album setting area, you can set transition and slideshow duration. Furthermore, you can match the slideshow duration to the music duration.

Choose Album theme

In the sub-tab “Album Theme”, you can choose a theme for the video. The software provides 75 various album themes. Also you can set the Title at the beginning and Credits in the end.

slideshow theme

Preview the photo video

In the tab, you can preview the video to check if it is ok. If it is not satisfying, redo the precious steps. Otherwise, go to next step.

2.Burn Disc

This step enables you to choose output format , specify output folder and create the video.

Click “Burn Disc” and choose the output format in the drop-down list, then set the format parameters and specify the output folder.

video output format

Finally, click “Create Now” to encode video files.

About Photo DVD Burner>>

Tuesday, June 26, 2012

How to make home DVD movies with best movie maker

Why should you make a home movie? Because home movie can be plyaed at home on big screen and makes you feel like you are in a theater.Especially, watch your photo movie and recall best memories.Watching a wedding photos movie makes you couple more cherish eachi other.A graduation video help you remember your friends and school life.In a word,a home photo movie has a special meaning.In the following ,I will teach you how to make a home DVD movie with best movie maker-Photo DVD Burner.
 
Learn more about Photo DVD Burner>>

1.Import photos files.
Launch the program, click “Organize” Photos tab to add photos. After opening the photo folder in the file folder list panel, You can click “Add All” to import all photos in a time, or click “Add” to add specified one photo.


2.Personalize with music, transition, caption and theme
In the “Organize photos”, you can make your movie unique and more eye-catching. You can customize transition effects and suitable theme. You can add captions for them by double-clicking photos, or add background music for the movie, even record your own sound to tell a story. If you like, you can add some artclips.

3.Choose DVD menus and preview
Switch to “DVD Menus” tab, you can choose DVD menus for your album. You can set DVD background music, image and menu navigator. And the sub-tab “Preview” enables you to preview the DVD movie.

4.Burn movie to DVD
Go to “Burn Disc” Tab, choose DVD Video Disc as output format, then set the parameters ,finally click ”Burn Now” to begin creating DVD movie.

Monday, June 25, 2012

How to create a wmv video free

How to create a wmv video free

If you want to make a wmv video and convert your photos to wmv slideshow video, I recommend free Windows Live Movie Maker. It is a good software to slideshow to DVD or upload it to Youtube.This article will show you how to use windows live movie maker to make a wmv slideshow video with photos and videos.

Step1.Download Windows Live Movie Maker and install it on your computer, then launch it.

Note: The software supports Windows Vista, Windows 7, Windows Server 2008, Windows Server 2008 R2.


Step2.Add Photos, videos and music

Click “Home->Add videos and photos” to add material needed for the video, also you can rotate the photos. Tab “Add music” allows you to add background music, you can set where the music will be played.


You can add Title ,Caption and Credits for the video if you like.
Step3.Choose Animations for photos

Under “Animations”, you can see 75 kinds of Animation effects. Select one photo and then click the transition, you can choose transition effects for each photo and set the transition duration. Kinds of Pan and Zoon effects are also available.


Step4.Choose Visual Effects

You can choose different visual effects for each photos, such as edge detection, posterize, threshold and more .


Step5.Output the movie

Click “File->Save Movie” to choose which setting you would like the movie to be saved as and choose an output folder,then click “save” to create the movie.


A wmv movie is finished.

For creating mp4,flv,swf,mov,mkv,3gp,mpg and avi videos, I recommend Photo DVD Burner. Also it provides various album themes and DVD menus and more transition effects.http://www.photodvdburner.com/create-photo-video.php

Wednesday, February 29, 2012

Create Photo Slideshow Video on iPad and Burn to DVD

You have a great number of photos on your iPad and they have already occupied lots of your iPad capacity? You have lots of photos saved to your online photo albums like Facebook, Picasa and Flickr and want to bring these still photos to life? Normally, you simply need to transfer these photos to your computer and then use the slideshow programs such as Windows Movie Maker, Windows DVD Maker, iMovie and iDVD to easily make photo slideshows. Also, with a few settings, you can also watch photos on your iPad in a slideshow way.

However, to make things easier, I'd like to show how you can make slideshows of your iPad photos, Facebook photos, Picasa photos and Flickr photos directly on your iPad.

The only app you need is Photo Slideshow Director HD. It can help you turn your photos into dynamic slideshow, complete with background music, transitions, texts, themes, etc. If you are unhappy with the effect of a photo, you can make full use of the photo editor embedded in this app to crop, rotate and flip the photo, adjust the brightness, saturation and contrast, apply beautiful stylistic effects, remove red eyes, add text or drawing and more.

When the slideshow is ready for showing, you can choose to play it on your iPad or on a bigger screen of HDTV. If you want to export the slideshow as a video file, you just choose to share moives to your iPad Photo Library. Or if you want to share the slideshow on YouTube or Facebook, this app lets you do that directly.

Create photo slideshow on iPad and burn to DVD

So back to the topic of this article, it turns out so easy to create photo slideshow video on iPad and burn to DVD. The first part has been resolved already. And to burn the photo slideshow video to DVD, you just need to connect your iPad to a PC or Mac, copy the encoded video from your Photo Library to the PC or Mac, import the video into Windows DVD Maker (PC) or iDVD (Mac) and then burn the video to DVD within the program.

Now let me once again simplify the process of making photo slideshows on iPad and burning to DVD:
  1. Download the iPad app Photo Slideshow Director HD from the iTunes app store
  2. Create photo slideshows using Photo Slideshow Director and save it to your iPad photo library as a HD video
  3. Connect your iPad to a PC or Mac
  4. Copy the slideshow video from your iPac to the PC or Mac
  5. Import the slideshow video into Windows DVD Maker (PC) or iDVD (Mac)
  6. Burn the slideshow video to DVD in Windows DVD Maker or iDVD
Done.

Monday, February 13, 2012

DVD Photo Slideshow Professional - Create photo slideshows and export them in DVD formats and more

Someone said that no matter how poor is the information, presenting it in an interesting manner will still get you some points. If your friend has better vacation pictures to show, you can still capture the audience by showing them a neat presentation. That's where DVD Photo Slideshow Professional (that's a mouth full) comes in. The name should be self explaining, but if you're a bit slow, it lets you create neat slideshows with tons of transition effects, themes and menus.

DVD Photo Slideshow Professional Review

If your Internet connection is sluggish, you should start downloading before going on vacation and by the time you get back, it should be done. The installation package is about 28 Mb large, but at least the installation itself goes without a hitch. You won't need to install anything else or restart your PC.

Although it looks complex, you don't need to be an advanced user in order to create a slideshow with this program. The interface works like a wizard with main buttons arranged in the order of the steps you need to take. First is the photo organizer where you browse through your folders and add images in the designated area. Here you can also choose transition effects and album themes. There's no advanced editing required here. Everything is neatly organized so that all you have to do is to select or click and drag. The second main button lets you choose menus for the slideshow. Again, it only implies selecting a menu and a few extra, but easy options. Finally you can burn your slideshow to a DVD. If DVD Photo Slideshow looks and feels too simple, the range of output formats helps you a lot in this regard. You can burn it as a DVD video disc, Blu-ray, MPEG-4, and many more. You can even export it in a format for your iPod or other iThings.

Pros:
The interface is organized very well so that you can create a more advanced slideshow in three short steps. You won't get lost in its options, but you will get lost in its wide range of stuff you can add to your presentation.

Cons:
The top menus are kind of useless. Basically, they do the same things you can do in the main interface. But that's not necessarily a bad thing. The less to click on, the better. Its simplicity could make it a bit restrictive, but this software is mainly designed to be family friendly. So why not let grandpa have a crack at it?

Memories are a great thing to keep. DVD Photo Slideshow Professional lets you store them away as a DVD video disc, Blu-ray and many other formats with easy to create menus and transitions.

Reviewed by Frederick Barton at findmysoft.com